
Essential Tools For Planning Your Website: Part 4 - Wireframes
—This is the fourth part of the Essential Tools For Planning Your Website series. Previously we looked at personas, the customer journey, and the site map. You'll need these handy for creating your wireframes so it's a good idea to read parts 1 - 3 first.
We are looking at wireframes in part 4, with style tiles coming the in the final part.
Wireframes
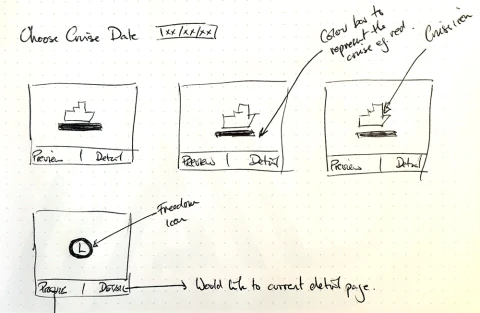
Sketching out initial ideas can be done quickly with pen and paper
We love getting to the wireframing stage when planning a website. This is when you can start to feel a bit creative by making simple plans or rough layout ideas for how your website will look.
When drawing wireframes for your website, start out simple. Think of large content blocks first, like navigation, search, text, gallery or forms. Don't worry about the fine details, especially in the early sketches.
With a wireframe, you are looking at how these different elements could sit together on your web page. Focus on the hierarchy of the elements on the page – does the page “read” correctly? In other words, are the elements in a logical order? Will their order work for your website users? Alongside hierarchy, also think about their proximately to one another. Elements close to one another are usually related while elements further apart are usually not.
Need help with your digital strategy?
Get in touch — we'd love to hear about your project.

Work out basic content areas first and add more detail later
Once you’ve got a basic layout that works, you can add a bit more detail. Remember that a wireframe is not a rough sketch of your website’s design so don’t worry about adding too much detail.
Wireframes are a great way to experiment with layout ideas in a quick and cost-effective way. Experimenting with ideas roughly on paper is much quicker than on screen, so start out with pen and paper. If you need to you can regenerate your wireframes digitally for sharing with your team later.
Creating Site Maps
- Make sure to refer to all of your planning materials up to this point and keep your target audience in mind
- Think of your wireframe as a visual checklist. Does it have everything your users need to achieve their goals on your website?
- Don’t be afraid to experiment with new ideas and layouts
- Start out with simple blocks and build up detail as your layout becomes more workable
- Don’t forget to consider mobile and tablet, alongside desktop layout ideas
- Talk through your wireframes with someone else to see if your ideas work. Is there anything you've overlooked?
What You’ll Need
- All of your planning materials for reference
- Pens and paper for rough / initial ideas
- Someone to talk through your wireframes with
- If required, make digital versions of your wireframes. We use Balsamiq Mockups 3
- Otherwise, a way to record your wireframes for sharing and for future reference
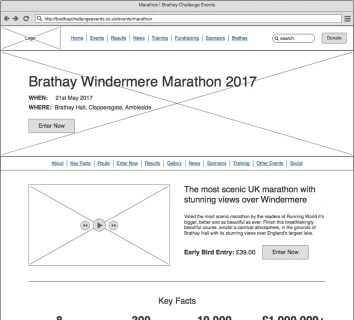
Part of a detailed wireframe made using Balsamiq Mockups 3
Next Up
The next tool we'll look at in the final part of this series is the style tiles. You'll need your wireframes, site map, customer journeys and personas, so keep these handy for part 5.